This is a shameless attempt to save the the most advanced civilization in
history from imminent self destruction by eliminating carbon emission,
dependence on foreign sources of fuel,obesity, hypertension and diabetes.
Cycling accomplishes all those things at once and helps us develop a better
understanding of ourselves, each other and our relationship to the cosmos.

Oh, horse puckey!
I like to ride bikes, have been doing it all my life.
The rest of that crap is just a fringe benefit,
and the blogosphere gives me a chance to share my interior
monologue with virtual rather than imaginary friends.
Showing posts with label Retro Trek. Show all posts

Tuesday, December 13, 2011

Nouvo Retro Trek, a real test drive.

   Sunday was such a nice day to take the Trek out for a nice little 25 mile spin.  I wanted to have a chance to put an hour or more in the saddle and see how the new handlebar height and freewheel felt for real.  I didn't try to make things difficult, but have a regular ride with a variety of hills to see how this Hyper glide freewheel actually performed.  I rode across town to the MUP that travels up through the Nature Center.  The hills are not that steep, but there is a variety of grades to encounter within a few miles.
When I reached the Nature Center I was surprised to see the trail as clear as it was. The trees being bare of leaves apparently helped the sun keep the snow and ice to a minimum.  Altogether there was a great time of moderate climbing with a couple of steep grades mixed in.  I had the opportunity to shift up and down several times from the 24 - 34 tooth cogs and was seriously impressed with the smoothness of the action over that huge leap.  I also liked the slower bailout gear which did just that, bailed me out without a triple crank.
Riding back through town, I had a chance to stop at the local coffee shop to take a break and visit with a couple others who were enjoying a late fall ride experience.    We had a good time chatting over bikes and coffee.  They had a few years experience and were looking for good charity rides to try the coming year.
We did have a good time chatting and exchanging information before heading on home.
On the way, I decided to "attack" a hill with this new gear ratio on the bike.
This is a  challenging   grade for nearly a mile.  I rolled up that in my lowest gear without any heavy breathing.
I just crawled right up like I was walking around the block.
The bike proved to be really comfortable and more pleasant to ride with two changes I made.  
I am now wondering about a new stem, a really wide ratio 9 speed cassette and maybe a true compact crank.
Sounds like a winter project coming up.

Monday, December 5, 2011

New positions for the old bike

As I mentioned a couple of days ago, I made the decision to raise the handlebars on my old TREK 560 road bike.  I'd been pretty spoiled by riding the Hunqapillar this past summer and thought, "wouldn't it be cool to have a lighter faster bike which felt like that."  I know what you are thinking, " another Riv owner drank Peterson's koolaid and never came back from the looking glass."  Maybe I got a little too much fairy dust up the nose, but dammit, a more comfortable bike will be ridden and enjoyed more often.  Won't it?
Well, anyway the biggest difference between the comfort levels has been the handlebar height.  I bought the stem riser from Riv, it takes a loooong 6mm allen wrench to install it, but that's just something we all need...
right?
After installing it and inserting the old stem as low as possible the bars were already taller than the seat.
I certainly didn't want them any higher and was actually pleased at the appearance.  It looks a little goofy with that much stem showing, but the riser has a pretty nice finish and it doesn't look too much like a frankenbike.
I double checked the level and found the bars are maybe 1-1.5cm higher than the seat nose.  I could live with that.  I took a short ride, adjusted the seat back about 3 cm to give me a longer reach, added an impromptu fender (grocery bag on the rear rack) since it had been raining, and took off.
The bike was immediately more comfortable.  I found myself stretched out over the hoods most of the time.  Didn't feel any stress in my back or neck and didn't suffer that claustrophobic scrunch when down in the drops.  I had thought that wider bars would be good but have dismissed that after one ride.

I whipped right through a 20 mile morning and felt ready for more.  I was in Illinois for the weekend and couldn't really find any challenging hills, but the next challenge will be to test the Mega Range freewheel against some steep climbs.


Monday, July 25, 2011

Reassembling the Nouvo-Retro Trek

    It was now time to put the old dog back together.  The main reason for disassembling the bike was the failing bottom bracket.  The old loose bearing units are not "lifetime" units.  It lasted 26 years, I serviced it on an annual basis but it finally got to a point where it just refused to work.  The new unit is a Velo Orange cartridge unit and it went in so easily it's hard to believe.  I could get used these new fangled sealed bearing things.  After putting it in I resisted the urge to look for left over parts, but it did seem too easy.
I chose the Velo-Orange for one simple reason, they use oversized bearings.  I'm not enough of an engineer to know all the details, but I have enough common sense to know that larger bearings should mean something in the long run.  Right now the choice we have in bottom brackets amounts to Tange, Shimano and a few other "throw away" units, and then there is the totally bombproof "dare you to outlive me" Phil Wood unit.  So we don't have much choice, the VO unit provides one so I made it.
  The only unusual prep for the build up was removing the powdercoat from a couple of places that didn't get adequately masked.  People tell me this is common on bike frames so I didn't make a fuss over it.  One person suggested sanding cloth, like that used to clean sweat fittings on plumbing.  I started that then realized that a Dremel tool would be a lot more effective.
It cleaned up the headset bearing quite easily
and it took a little more  care to clean up the shifter bosses but still got it done in short order compared to hand sanding.
    The rest of the parts went on just as they should,
when you've been toying with a bike as long as I have this one, it goes together in a flash.
    I was back on the road and really pleased with the overall facelift.
the color and the addition of the fenders give it a real retro look while making it a lot more practical.
I haven't given up on installing the front part of the fender, but I just haven't found exactly the way to do it.
Actually the missing part provides no real protection. For some reason, you can put cheap plastic partial fenders on and not be offended, but it just rubs the eyes wrong for a highly polished hammered texture fender to be incomplete.  Maybe I could just get used to it and nickname him "Semi-Elegant."
    Of course at my local LBS I was told it "doesn't look that bad!"
Not that bad?
                       Semi-Elegant is
                                                   not that bad?

Sunday, July 24, 2011

Detailing the Trek

      Today I put the third coat of spray on the headtube, lug windows and the neat little cast trademarks on the
Trek.   I chose a gold color to contrast with the silver powdercoat, it will go really well with the leather saddle and handlebar tape I use also.
 After stripping the masking off the frame, I wanted to enhance the lugwork by outlining the outside of the the lugwork.  I had chosen Testor's paint for the detailing for two reasons, one that it is formulated to adhere well to plastic (powdercoat) and I could get it in spray, bottle and in a paint pen.
which makes lug lining a real breeze.
Lining the lugs is really not as difficult or time consuming as it might look, the pen makes it easy to get an accurate line on the outside of the lug, and when I did make a mistake I could easily wipe it off the powdercoat and simply reapply.
    The end result was pretty effective,
while not being too garish.
now I will be all ready to reassemble and ride it tomorrow morning!

Saturday, July 23, 2011

Nuovo Retro Trek-powdercoating

      As you probably remember, however vaguely, I have been giving my favorite and only road bike, a vintage TREK 560, a face lift.  I needed to replace the bottom bracket and, since I wouldn't be using it for a couple of weeks, I decided to leave the old beauty at a powdercoater to have the "custom" (rattle can) finish removed and replaced.
It really wasn't a bad looking job but I got tired of scratching it every time I rode it.  Powdercoating is supposed to be the most durable finish available these days so I gave it a try.  One minor problem made it take longer than I expected, they use a very aggressive stripping method and my seat post is stuck.  Since I really didn't want to remove it, it took a few days longer to strip it by hand.  I was afraid they would try to charge more when I picked it up but the people of Pro Finish Powdercoating of  Grand Rapids were really nice, accommodating and did it for the quoted $115. 
   A lot of vintage bike enthusiasts don't believe in using powdercoat because it is thicker and obscures the details of the lugwork.  I really didn't see that in the result.
I used a high metallic color of silver, which I am told shows details more clearly.  I think the lugwork was very well defined and shows off the cast trademarks quite well.

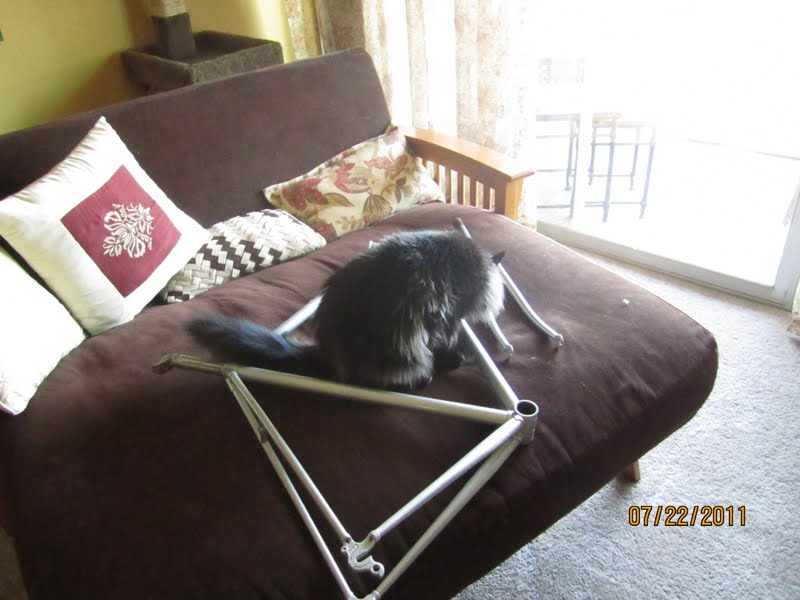
My cat gave it his blessing and approval,so I continued with the finish work.  Being a tried and true vintage bike aficionado (aka obsessive nutcase) I couldn't leave it one simple color. The lugs had to be detailed, so I sweat through the evening news masking the headtube and those interesting cast trademarks
and then masking the rest of the frame to prevent any overspray.

    I was all ready to add some color and, after priming the headtube, sprayed it with a contrasting metallic gold.
    Those nifty little tradmarks were fun to play with, I simply sprayed over them, gave it a minute to set and wiped the excess off the lettering with mineral spirits before it completely dried.
When I'm finished, the lettering will stand out in clear relief against a contrasting base.  I am able to get period correct decals from a number of different sources, but since this is an unusual tradmark that Trek used for only a few years, I decided to dispense with any other identification.
More fun through the weekend.

Monday, July 4, 2011

The Retro-Nuovo Trek,Removing a fixed cup

       This is the time I stressed about when thinking of rejuving the old Trek.  Years ago I had updated the drivetrain with a new Sugino compact crank and seven speed freewheel.  I knew that the BB axle was a couple mm long for the crank but didn't really worry about it.  Now the bottom bracket is shot.  I know these old clipped bearing units are supposed to last forever, but things don't always stay nice.  Last year I had to replace the bearings, they literally fell out of the clips when I tried to lube it.  This year, I can't keep it in adjustment no matter how I try, it just creeps tighter and needs readjustment each time I ride.  So, replacing it with a new cartridge unit is all that makes sense.
     When I took it apart the retaining ring and adjustable cup stuck together until I had the unit apart.  The axle and bearings came out normally except that one of the bearing clips was broken and in pieces.  Oops!
That's part of the problem.  What I wasn't looking forward to was removing the the fixed, or drive side, cup.  It had never been removed and I anticipated it would be stuck since that is the common wisdom.  I consulted Sheldon Brown and found  that he had developed a reasonable and inexpensive method for removal.  It amounts to placing a bolt through the axle hole with washers on each side and a nut to tighten.
The theory is that, since the cup has reverse threads, when you tighten the nut it will automatically loosen the cup as you tighten the nut.  I was prepared for a battle and expecting failure and the use of "Freeze Off" or some other extreme measure.
I inserted the bolt, put the nut and washer in place and used a long socket to hold it
while I tightened the nut.  To my surprise, it worked!  The first time, without effort, muss or fuss, it just came right out!  Thank's again to Sheldon Brown and his encyclopedia of bikology.
Now I am ready to take the frame off to a powdercoater since I won't need it for a couple of weeks.

Tuesday, June 21, 2011

The hidden solution

A while back Sommervillian made a suggestion to anchor the Porteur rack to Byron.  While the anchor for that rack presented no structural problems the suggestion works great for this fender issue. He suggested making a hidden bracket extending under the brake to support the rack, in this case the fender is the issue and requires less of a brace.
My first thought was to use the duarma bolt under the fender but it just wasn't long enough to attach a brace.  I had an old bracket lying around and used a bench vice to make it behave.
.After working with it, I knew I was on the right track but needed a different attachment point.
I ended up wrestling it back the other way to attach it to the brake bolt itself.
Now there's something to work with.
After drilling a couple of holes in fender itself (the little dimples were really convenient at this point),
The untrained eye will not even notice it except for the one screw head.
It's not a perfect fit or adjustment yet but I'll be able to work with this and get a decent looking fender line and the vertical clearance I need to clothe those poor naked tires.
The only thing left is that screw head.  I don't need a light on this bike.  Maybe a "hood ornament" of some kind.  I'm not really that crazy...am I?

Sunday, June 19, 2011

A wrenching epiphany/ delusions realized

The experts all say we reach a point in life where all denial fades, a crisis so great hits that we face our inadequacies and reach a denouement, a real turning point.  A moment of clarity leads us in a new direction and clears the fog of life away to grow upward on a new path.  My moment came yesterday.  After reaching the bottom of my second mug of Oberon at Hooters, the clarity hit me-- I have a Sheldon's Fender Nut at home!  I didn't know where, but I know I didn't need it on a previous fender installation so...it had to be there.   I raced home and spent a feverish half an hour fumbling about my garage like a besotted Dudley Moore trying to fix a plastic napkin holder, but I found it!
Sheldon's Fender Nuts are an ingenious design from the late and irreplaceable  Sheldon Brown.   It is a nut for recessed brake bolts which has a threaded extension to allow a 6mm bolt to attach an L-bracket or sliding bridge and provide a little more freedom installing fenders.  It's just what I wanted to get the fender clearance I needed on the rear without interfering with the brakes.
After attaching the sliding bridge I bent the upper part of the bracket to prevent it from slipping down


and I magically had all the clearance I need on the rear.  The bridge will be flattened out and a better install will be made after I have the frame repainted, but now I know it will work.
Confident that I had all the problems solved and could "tweek" the fender lines when I reinstall them, I took it out for a test.  Boy had I screwed up!
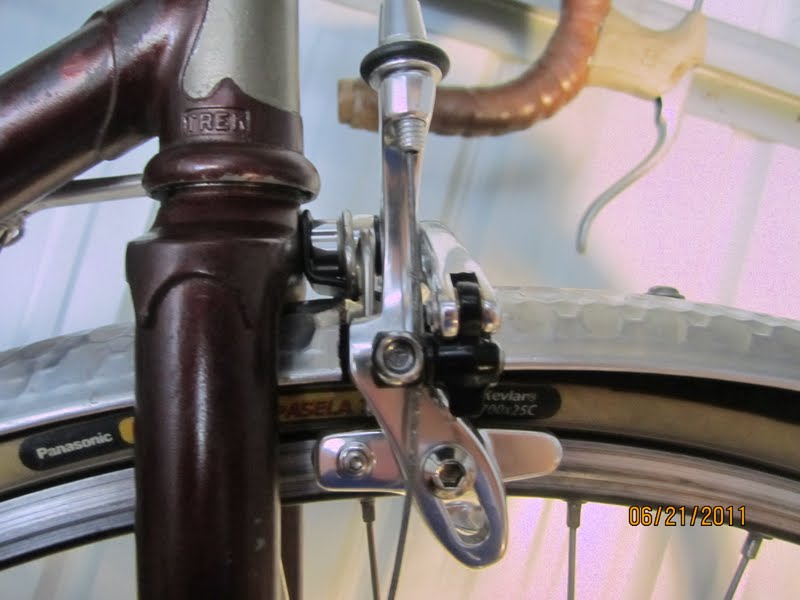
The front brakes were practically useless, forced the fenders into the tires and the front fender rubbed anytime I got out of the saddle. Without realizing it, I had forced the brake calipers almost closed by cinching the fender up into the fork.  I pondered on this and found no solution but to cut the front of the fender off.
The brake bridge in front just does not have the proper angle to create a usable clearance for the tire.

The real problem is the head tube angle and fork slope.  The brakes extend that angle and force the fender into the tire. There is just no more vertical room.
That is the classical problem found on 70-80's road bikes, they just weren't built for anything but fast riding.
I'm just going to have to sacrifice that appearance for any kind of performance,
 but functionally, I don't need the front part of the fender anyway.

Friday, June 17, 2011

Developing a Nuovo Retro Trek

My favorite old bike is this '86 Trek 560.

 I bought it new and have ridden it for every purpose under the sun.  Even though it's technically dated, it's still fast and fits great.  It recently developed  bad cough, in the form of a bottom bracket going bad.  After 25 years I guess it has a right to complain.  I've actually thought of replacing it.  Even considered carbon fiber.  But I've talked with people who own carbon bikes and, although they love the weight and ride, they agree it's not worth the money or risk for me.  I don't race.  That's all carbon fiber is good for-competition.  Whether competing in real races, on club rides, or with yourself, carbon fiber is just not durable enough for anything but riding around really fast.  I only do that 2-3 times a month on club rides.  I've heard of nightmarish repairs after some chain wrap, leaning the bike against walls or simply dropping them accidentally.  I feel that if I can't drop the bike on the ground with some confidence, I shouldn't have it.  As far as weight is concerned, well, the Trek, with 510 tubing weighs around 20 lbs.  I might loose 4 lbs by going to a new bike, but since it will use the same 220lb motor, that only represents a 1.7% improvement.   I figure I have better gains to make concentrating on the motor.
So I decided to breath some new life into the old dog and one thing I wanted to do was add fenders.  Since I ordered the wrong size for Byron at first, I have a set of VO hammered fenders in 45X700. I thought they would never fit but tried them and they do,
barely.
The brakes would interfere with the fenders or the fenders with the brakes (depending on your point of view), so they needed to be replaced.  Tektro makes a really nice "wide mouth" brake unit called the R538.  They provide clearance galore.

Mounting the front was not problem, using the VO duarma bolt to attach the fender to the brake bolt.  I had to wack off the excess bolt to create clearance
but a Dremel tool took care of that in short order.
and after adjusting the stays we had a winner.

The clearance is close but everything spins freely.   I can gain another 1/4 inch of clearance by removing the washers between the frame and fender, they really only provide redundant protection to the headset.
The rear was a different matter.  The rear bridge is set up for nutted brakes so I needed to drill out the bridge to accommodate the new recessed mount.
The fenders themselves had to be trimmed to fit the narrow chainstay clearance.
It's all in the fun of wrenching and solving problems, and that's what I am coming up with on the rear.
The rear fits, but the angle is such that the sliding bridge does not provide the lift and stability at the very top of the tire where clearance is needed.  I am thinking of two possibilities;one to cut the fender and anchor it over the brake bridge with a bracket, or buy a VO constructor rack and use the attachments on it to create the extra clearance.   Either way, I have time to think about it.  Since I am tearing things apart to replace the bottom bracket, I'll have it powdercoated and give it a facelift.

So there will be more to this in the coming few weeks.